Alcove shelving, floor to ceiling
The alcove beside a chimney breast is the best place in a house for books, and the worst place to buy a bookcase for: no two are the same width, none of them is square, and the ceiling is lower than it looks once you try to stand something up. Here is how to measure one, size the shelves so they do not sag, and fix the result to the wall.
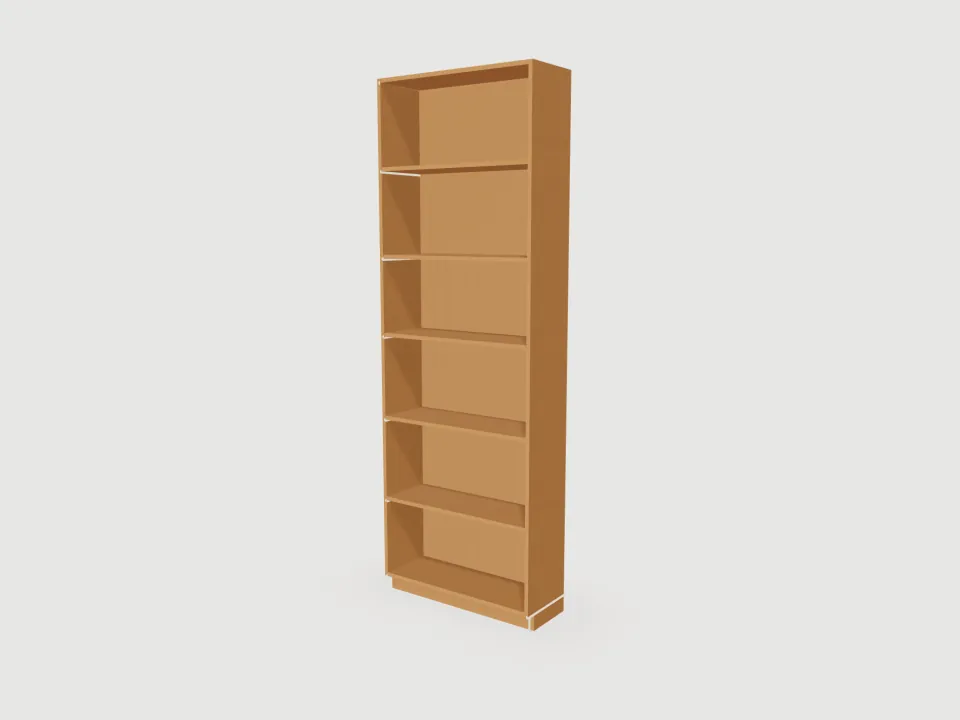
Why built-in alcove shelving beats a bookcase
An off-the-shelf bookcase in an alcove always looks like what it is: a box parked in a gap, with a strip of wall either side and a band of dead space above it. Built in, the same shelving reads as part of the room. It runs from the floor to just under the ceiling, it fills the width to within a few millimetres, and its front lines up with the face of the chimney breast.
There are two ways to get there. The quick one is shelves on battens screwed to the three alcove walls. It is cheap, but every shelf is only as straight as the wall it sits on, the heights are fixed for good, and the raw ends show. The other way, and the subject of this guide, is a made-to-measure carcass: two sides, a top, a bottom and a back, cut to fit the alcove, with adjustable shelves inside. It does not depend on the walls being flat, the shelves can move, and every visible edge is finished.
How to measure an alcove for shelves
Assume the alcove is out of square, because it almost certainly is. Chimney breasts in older houses were plastered by eye, and the walls either side of an alcove are rarely parallel, rarely plumb, and rarely meet the back wall at 90°. A single measurement across the middle is how a carcass ends up 8mm too wide at the top.
- Width, six times. Measure across the alcove at the top, the middle and just above the skirting, and do each of those at the back wall and again at the front, where the chimney breast ends. Write all six down. The one that matters is the smallest.
- Height, front and back. Floor to ceiling at both sides of the alcove, at the front and at the back. Floors slope and ceilings sag; again, the smallest figure is the one you design to.
- Depth. From the back wall to the face of the chimney breast, at the top and at the bottom. This tells you how deep the unit can be if it is to finish flush with the breast.
- Plumb and square. Hold a level against each side wall to see which way it leans, and a large square into the back corners. You are not going to fix the walls; you are finding out where the gaps will be, so you know how much scribing to expect.
- Obstacles. Skirting boards, picture rails, sockets, a radiator pipe in the corner. Skirting on the side walls makes the alcove narrower at floor level than above it, so either take the skirting off inside the alcove or size the carcass to clear it.
Then take the smallest width and subtract a fitting gap — around 10mm overall is the usual allowance — so the carcass slides in without binding on the tightest point. The gap that is left is closed by scribing, below. If you are shelving both alcoves either side of a chimney breast, measure each separately: they are seldom the same width, and two units sized to their own alcoves look more alike in the room than two identical units with different gaps.
Floor to ceiling, and why not quite
The instinct is to make the unit exactly as tall as the ceiling. It will not go in. A tall carcass is assembled on its back on the floor and then tipped upright, and as it swings up its diagonal — the line from the back of the base to the front of the top — passes through vertical. If that diagonal is longer than the ceiling is high, the top corner hits the ceiling before the unit is standing.
The diagonal is the square root of height² plus depth², so the deeper the unit the more height you have to give up. The example in this guide is 2350mm tall and 300mm deep, which is 50mm short of a 2400mm ceiling for exactly this reason. The gap at the top is then closed with a scribed fillet or a length of cornice, which is how built-in joinery has always hidden it.
The example also stands on an 80mm plinth, set back 50mm from the front as a toe recess. The plinth is the part to pack level if the floor runs out: shim under it until the carcass sides are plumb, and the shelves will follow.
Shelf sag, and the 900mm limit
Books are heavy, and a shelf that looks dead straight empty will show a smile across its middle a month after it is loaded. Shelf sag is the most common quality complaint in configured shelving, and it is entirely a question of span: the distance between the two things holding the shelf up.
For 18mm board, sag becomes visible past about 800mm under load, and 900mm is the practical limit without a support in the middle. Sizewood does not just warn about this; it enforces it. Above 800mm of clear bay width it flags the shelves as likely to sag, and if a bay would exceed 900mm it adds a column rather than let you order a shelf that bows.
In alcove terms, with 18mm sides, a single-bay unit can be up to 936mm wide overall before it needs a divider, and stays under the 800mm warning up to 836mm. Two bays carry you to 1854mm, which covers a very wide alcove. The divider is not a compromise: it is a full-depth upright, drilled for shelf pins on both faces, and it stiffens the carcass as well as the shelves.
The example is 800mm wide, which leaves a clear bay of 764mm and shelves of 762mm — 2mm shorter so they slide in. That is inside both limits with room to spare.
Depth against the chimney breast
How deep to go is decided by the chimney breast more than by the books. A unit whose front finishes flush with the face of the breast looks built in; one that stands proud of it looks like furniture, and one set well back leaves a shadowy ledge. If the breast projects further than you want shelves to be deep, set the carcass back by an even amount and let the breast frame it.
Remember that the overall depth is not the shelf depth. The back panel sits in a groove 16mm in from the rear edge and is itself 18mm thick, so it takes 34mm out of the inside, and each shelf is another 2mm short of the back so it fits. On the 300mm example that leaves 264mm of shelf — enough for most hardbacks and well beyond a paperback. Sizewood accepts depths from 150mm to 600mm, so a shallow alcove can take a shelf for paperbacks alone and a deep one can hold records or files.
Scribing to the wall
Scribing is the joiner's word for cutting a piece of timber to the shape of whatever it sits against. Press a strip up to an uneven wall, run a pencil along it with a spacer or a compass held to the wall, and the line it leaves is the wall's profile. Plane or saw to the line and the strip fits the wall with no gap, however wavy the plaster.
On alcove shelving the scribe goes on the front edges, where the gap between the carcass sides and the alcove walls would show. Cut a fillet strip for each side, scribe it to its wall, and fix it to the front edge of the carcass side. The same goes for the gap above the top.
Be clear about what the configurator does here: it designs a rectangular carcass to the dimensions you give it, and it does not add a scribe allowance or produce filler strips. That is deliberate, since a scribe has to be marked off the actual wall. So size the carcass to the smallest measurement less your fitting gap, and treat the scribed fillets as a short job for the fitting day, cut from a strip of matching board.
Fixing it to the wall
A unit 2.35m tall and 300mm deep is a tipping hazard the moment its top shelves are full, and it has to be fixed to the wall. The back panel is what makes that easy. It is a full 18mm board — the same as the carcass — captured in a 9mm-deep groove on all four inside faces of the sides, top and bottom. That braces the carcass against racking, and it gives you something solid to screw through.
Fix through the back into the alcove's back wall near the top, and lower down if the back wall is far from flat, packing behind the fixing so the screw does not pull the carcass out of true. Use fixings to suit the wall: masonry plugs for solid brick, cavity fixings or a stud for plasterboard. Check for cables and pipes before you drill; a socket below the alcove often means a cable running straight up the wall behind it. Wall fixings are not part of the cut-to-size order, so buy them separately.
Inside, the carcass is held together with cam-and-dowel fittings at each joint, and the quote includes a fixing set for every one. The shelves rest on pins in Ø5mm holes on the 32mm system, set 37mm in from the front and back edges. Holes are bored in a band three steps either side of each shelf, so every shelf can move 96mm up or down without the sides being drilled full height.
Board, edges and what it takes to make
The example is cut from H3090 ST22, a Shorewood woodgrain on an 18mm melamine-faced chipboard, but any of the carcass boards will do: four other decors in 18–19mm chipboard, 18mm birch plywood, and three 18mm MDF lines. Chipboard comes in 2800 × 2070mm sheets; ply and MDF in 2440 × 1220mm. A grained board keeps its grain running up the sides, so the pattern follows the height of the alcove.
Every visible front edge — sides, top, bottom, shelves and the plinth front — is banded in 2mm ABS. Edges that face the wall or sit in a groove are left raw, so you are not paying to band an edge nobody will see. The whole unit nests onto two 2800 × 2070mm sheets, and that is how it is priced: material is billed by whole sheets, because that is how board is bought, and the offcut is yours.
From measurements to a cutting list
Once you have the three numbers — the smallest width less your fitting gap, the height that will tip up under your ceiling, and the depth that lines up with the breast — the design is a few minutes' work. Open the example below, change the width, height and depth to yours, and set how many shelves you want. The preview, the panel list and the price all update together, because they are all reading the same set of panels.
What you take to a workshop is a cutting list as XLSX or CSV — one row per part size with decor, thickness, length, width, quantity, a description and the banding on each of the four edges — and a nested DXF. The two matter together. A cutting list has no column for machining, so the back grooves and shelf-pin holes are not in it: on the example that is 4 grooves and 140 holes. The DXF carries them, so send both, or order the machining separately.
Fitting
- 1. Build the plinth box in the alcove, packing it level both ways. Everything above inherits it.
- 2. Assemble the carcass on its back on the floor: sides to bottom, slide the back down the grooves, then the top.
- 3. Tip it upright in front of the alcove, with a second person on the top end. This is where the diagonal matters.
- 4. Lift it onto the plinth and push it back into the alcove. Check the sides for plumb before fixing anything.
- 5. Fix through the back into the wall, packing behind each fixing so the back is not pulled out of flat.
- 6. Scribe the side and top fillets to the walls and ceiling, fix them, then put in the shelf pins and the shelves.
Leave the shelves out until the carcass is fixed. It is lighter to tip up, and an empty carcass shows you straight away whether it is standing square.
- Size
- 800 × 2350 × 300
- Board
- H3090 ST22 18mm
- Shelves
- 5, adjustable
- Units
- Millimetres