Kitchen base units from a cutting list
The standard dimensions of a kitchen base unit, why they are what they are, and how to turn a run of carcasses into a cutting list a cut-to-size workshop can make: every panel, every edge, and the drawing to go with it.
Why build the carcasses yourself
A kitchen is mostly boxes. Strip off the doors and the worktop and what is left is a row of plain carcasses: two sides, a top, a bottom and a back, on a plinth. They are the least glamorous part of the room and the part that decides whether it fits.
Flat-pack ranges come in fixed widths, so a wall that is not a multiple of them ends in a filler strip. A made-to-measure kitchen fixes that, but you pay for someone to measure, draw and order every panel. In between is the option this guide is about: you work out the panels, a cut-to-size workshop cuts and edges them from a cutting list, and you put them together. The board and the machining cost what they cost wherever you buy them. The drawing is the part you can do yourself.
Standard kitchen base unit dimensions
The numbers below are conventions, not regulations, but appliances, worktops and hinges are all made to fit them. Change one and the rest have to move with it.
- Carcass height, 720mm. The box itself, without legs or plinth. It is the most standard number in the kitchen and the one dishwashers and under-counter fridges are built around.
- Plinth, 100–150mm. The kick board the carcass stands on. 150mm is the common choice and gives a little more room for an uneven floor.
- Worktop, about 900–910mm off the floor. 720mm of carcass, 150mm of plinth and a laminate worktop of around 38–40mm. A thinner stone or compact top brings that down a little. If you are tall, the plinth is where to add height, not the carcass.
- Worktop depth, 600mm. The usual stock depth. The carcass is made shallower so the top overhangs the doors by roughly 20–30mm, which keeps drips off the fronts and your knuckles off the handles.
- Carcass depth, about 560–580mm. Whatever is left of the worktop once you take off the door thickness and the overhang you want.
- Widths in steps. Off-the-shelf ranges go 300, 400, 450, 500, 600, 800 and 1000mm, because their doors only come in those sizes. If you are cutting your own doors you don’t need those steps at all.
Wall cabinets follow their own conventions, usually 720mm tall and 300–350mm deep, hung without a plinth. They are a separate box and a separate guide’s worth of detail. Everything here is about the base run.
Getting the depth right against the worktop
Depth is where a cut-to-size kitchen carcass most often goes wrong, because three things add up to it and people measure only one. In the Sizewood configurator the depth you set is the carcass, from the wall to the front edge of the sides. The doors and drawer fronts are applied on top of that, 18mm proud of it.
The worked example below is 570mm deep, so its fronts finish at 588mm. Under a 600mm worktop pushed tight to the wall that is a 12mm overhang, which works but is on the shy side. Set the carcass to 560mm, as the configurator’s plain base cabinet does, and the fronts land at 578mm with a 22mm overhang. Walls are rarely flat, though, so measure the depth at a few points along the run and design to the shallowest.
The maximum carcass depth the configurator allows is 600mm. Deeper than that and you are building something other than a standard base unit, and a standard worktop will not cover it.
How the carcass goes together
There are two ways to box up a cabinet and they give different cutting lists from the same drawing. Either the top and bottom sit on the sides, or the sides run full height and the top and bottom fit between them. Pick one and stick to it. Mixing the two halfway through a kitchen is the classic way to waste a sheet.
Sizewood builds frameless, European-style carcasses with the sides running full height. The sides are the full 720mm, and the top, bottom and back fit inside them. A wide unit is divided by full-depth dividers rather than being several separate boxes. A shelf or bay is limited to 900mm wide, because past that an 18mm chipboard shelf visibly sags. Make a unit wider than that and the configurator adds a divider instead of letting you cut a shelf that will bow.
The 1800mm example is one carcass of three 576mm bays, not three boxes screwed together. That keeps the part count down and puts one continuous top and bottom under the worktop. The limit is the sheet. The top and bottom are single panels, and on a 2800mm sheet with a trim margin at each end, a run much past 2.7m will not fit. Split a longer wall into two carcasses and join them through the sides.
Sides and dividers are bored with shelf-pin holes on the standard 32mm system, 37mm in from the front and back edges. They are only drilled in a band around each shelf, so you can still move a shelf up or down by 96mm without paying to drill the whole panel.
The back panel and the plinth
Flat-pack carcasses usually have a thin hardboard back pinned on. It is cheap, but it is also all that stops the box racking into a parallelogram, and under a heavy worktop it is the first thing to give. Sizewood cuts the back from the same 18mm board as the carcass and sets it in a groove, 9mm deep and 16mm in from the rear edge, on the sides, top and bottom. That is partly a structural choice and partly a practical one: cut-and-edge lines take board between 17mm and 26mm, so a 6mm back would mean a second order from a second supplier.
The trade-off is depth. A grooved 18mm back sits 34mm in from the rear, and that is depth taken from the shelves and drawers. It does leave a 16mm gap behind the back. That is less than the deeper service gap some kitchens leave for pipes, so if water or gas runs along the wall at base-unit height, plan for it. The configurator can bore an 80mm cable hole through the back of any bay, 100mm below the top. That is enough for a plug and a cable but not for waste pipes.
Most kitchens stand on adjustable plastic legs with a plinth clipped to the front. Sizewood builds the plinth as a box instead: four rails cut from the carcass board, between 70mm and 150mm tall (or none), with the front rail set back 50mm to give you toe space. That is a fixed base, so pack it level on the floor before the carcass goes on. On an island, where both long sides are on show, the toe space is cut at the back as well.
Doors and drawers
The carcass is the easy part. The fronts are where the details pile up, and it is worth knowing which details are drawn into the panels and which you still have to buy.
- Doors sit on the front of the carcass, cut from the same board, with a 3mm gap around them and 2mm edging on all four edges. The 35mm hinge-cup holes are bored on the inside face, 22mm in from the hinge edge and 100mm from each end, with two hinges up to 900mm tall and more above that. A 5mm hole for the handle is drilled on the opening side. The holes are in the drawing, but the hinges and handles are not in the quote.
- Drawers split a bay into equal slots, each with a front and a four-part box: two sides, a back and a base. The box is 180mm tall at most and stops 20mm short of the back panel. It leaves 13mm each side for the runner, which is a typical figure for side-mount ball-bearing runners, but check it against the ones you buy. The base is 6mm HDF slid into a groove 10mm up from the bottom of the sides and back, so it is its own line on the cutting list and its own sheet in the price. A pair of runners per drawer is included in the price.
- Bays with drawers have no shelves. A bank of drawers fills its whole bay, so the configurator will not put a shelf where it would cut through the drawer boxes.
What it does not do: the worktop and the appliances
The worktop is not part of the design. Sizewood models the carcasses, fronts and plinth. It does not model the worktop, sink or hob cut-outs, or the gaps for a dishwasher or washing machine. Buy the top as a stock length from a worktop supplier, or have it templated if it is stone, and fix it down through the carcass top.
The same goes for appliance gaps. A 600mm space for a dishwasher is just space, with no panel to cut, so leave it out of the run and design the carcasses on either side of it. Check the appliance’s installation sheet for the exact opening before you fix the width of anything next to it.
The cutting list, worked through
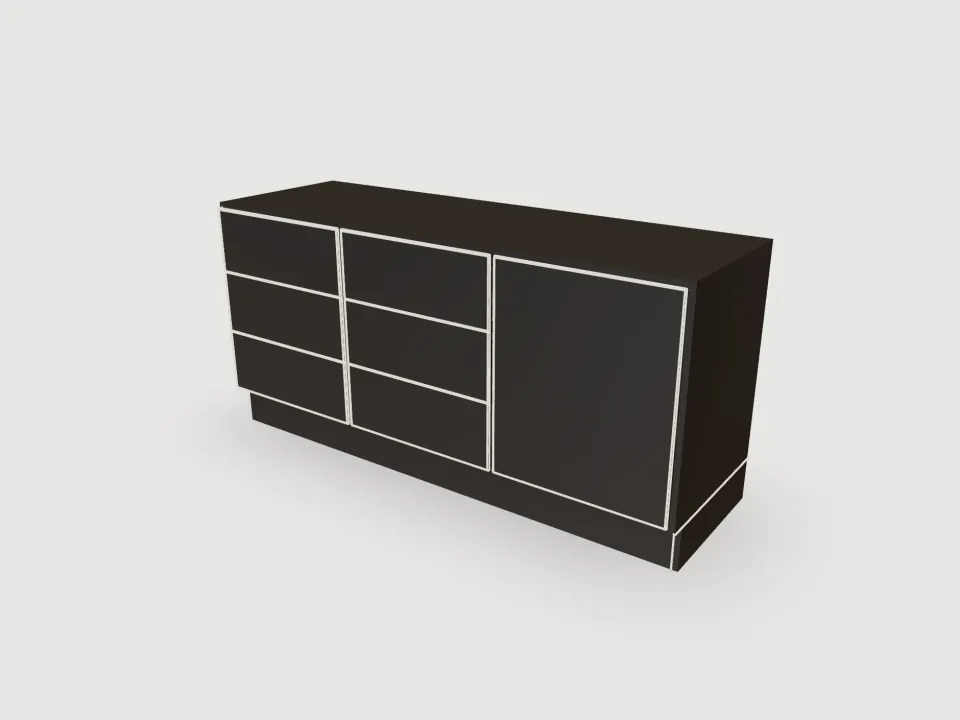
Here is the full DIY kitchen carcass cutting list for the example: an 1800mm base run, 870mm overall (a 720mm carcass on a 150mm plinth), 570mm deep, with two banks of three drawers and a doored cupboard with one shelf. The board is Onyx Grey melamine-faced chipboard, decor U961 ST2, 18mm thick. Sizes are length × width in millimetres, and the edges column shows which edges carry 2mm ABS.
| Part | Qty | Size | Board | Edged |
|---|---|---|---|---|
| Side | 2 | 720 × 570 | 18mm | Front |
| Top / bottom | 2 | 1764 × 570 | 18mm | Front |
| Divider | 2 | 684 × 536 | 18mm | Front |
| Back (grooved) | 1 | 1782 × 702 | 18mm | None |
| Shelf | 1 | 574 × 534 | 18mm | Front |
| Door | 1 | 681 × 573 | 18mm | All four |
| Drawer front | 6 | 225 × 573 | 18mm | All four |
| Drawer side | 12 | 516 × 180 | 18mm | One edge |
| Drawer back | 6 | 514 × 180 | 18mm | None |
| Drawer base | 6 | 530 × 515 | 6mm HDF | None |
| Plinth front | 1 | 1764 × 150 | 18mm | One long edge |
| Plinth back | 1 | 1764 × 150 | 18mm | None |
| Plinth side | 2 | 520 × 150 | 18mm | None |
That is 43 parts. Some details are worth pointing out. Each drawer front is 225mm, a third of the 684mm opening less the 3mm gap. The back is 18mm bigger than the opening each way, because it reaches 9mm into the groove on every side. The dividers are 34mm shallower than the sides, since they stop in front of the back panel instead of being grooved for it. And only the edges you will see are banded. The back, plinth sides and drawer backs are left raw, because banding an edge nobody sees is money spent for nothing.
The parts nest onto two 2800×2070 sheets of the grey board, plus one 2440×1220 sheet of 6mm HDF for the six drawer bases. The price counts whole sheets, because that is how a workshop sells board: you buy the sheet and keep the offcut. Cutting, edging per metre, grooves per metre, drilling per hole, carcass fixings and drawer runners are added on top, and every figure changes as you drag a dimension.
You can download the list as an XLSX or CSV laid out like a workshop cutting-list template: decor code, thickness, length, width, quantity, description, the four edges and the edge finish. That template has no column for machining, so the back grooves, drawer-base grooves, hinge cups and shelf-pin holes cannot go in it, and the configurator tells you so rather than letting the parts arrive plain. Send the nested DXF as well. It lays out every sheet with cuts, grooves and drill holes on separate layers, ready for a CNC.
Which board for a kitchen carcass
Melamine-faced chipboard is the standard kitchen carcass board for good reasons: it is flat, it comes ready-finished on both faces, and once the edges are banded it wipes clean. The configurator stocks five decors in 2800×2070 sheets: Premium White, Shorewood, Natural Halifax Oak and Onyx Grey at 18mm, and Tossini Elm at 19mm. There is also birch plywood and three MDFs in 2440×1220.
Chipboard has one weakness in a kitchen: water. A banded edge is sealed. A raw edge, or a hole drilled through the face, is not. Put a sink base on a plinth, seal any hole you cut for a pipe, and don’t leave a dishwasher leak standing on the carcass bottom. On the woodgrain decors the grain is locked along the length of each part, so the sides and doors all run the same way. That affects how the sheets nest, and the sheet count shows it.
Assembly
- 1. Build the plinth box and set it where the run will stand. Pack it level along its length and across its depth now, while it is light. Everything above inherits its errors.
- 2. Fix the bottom to one side, then fit the dividers into it, working along the run.
- 3. Slide the back down its groove from the open end, then close the carcass with the top and the second side. The back is what squares it, so check the diagonals before the last fixings go tight.
- 4. Lift the carcass onto the plinth and screw it to the wall through the back, into studs or plugs, at the top rail.
- 5. Make up the drawer boxes, sliding each base into its grooves before the back goes on. Fit the runners, then the fronts, and adjust the gaps last.
- 6. Fit the shelf pins and shelf, hang the door on its hinges, and the run is ready for its worktop.
The configurator’s assembly view walks through the carcass part by part, and clicking a part in the parts view shows you what it joins to.
Designing your own run
Measure the wall at the floor, at 720mm and at 870mm, and use the smallest width. Take off any end panels or fillers you want to keep, then the appliance gaps, and what is left is your run. Open the example below, set the width, and choose drawers or a door for each bay. The cutting list, the sheet layout and the price change as you go, because the 3D view, the list and the quote all come from the same set of panels. When it is right, download the files and take them to whichever cut-to-size workshop is nearest.
- Board
- MFC 18mm
- Construction
- Frameless
- Back
- 18mm, grooved
- Units
- Millimetres